RTW: Using Phalanx
The Phalanx is a formation used by pikemen and long spear units in RTW.
Applicable Units
The Phalanx is usable by pikemen/hoplite troops:
- Armoured Hoplites
- Bronze Shield Pikemen
- Heavy Spearmen
- Hoplites
- Levy Pikemen
- Militia Hoplites
- Nile Spearmen
- Nubian Spearmen
- Pharaohs Guards
- Phalanx Pikemen
- Poeni Infantry
- Royal Pikemen
- Sacred Band
- Silver Shield Pikemen
- Spartan Hoplites
- Spear Warband
Description
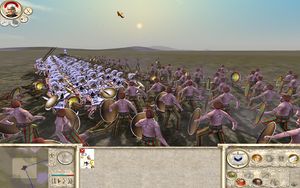
The phalanx is a dense block of men with shields and very long spears or pikes. The men stand shoulder to shoulder and hold their shield in front of them creating a layer of them.
The formation works by having the first few ranks lower their pikes to form a wall of them to stab approaching enemies the next ranks put theirs at a 45 degree angel to help block arrows, and the rear ranks keep theirs vertical out of the way. Thus the phalanx is a block of steel with sharp points.
There are different length spears for different phalanx, the best being Levy Pikemen or better that the Maceadonens/selucids/P of P/Traceens have. They can aim a maximum five ranks of pikes forward, provided the formation is deep enough, and can keep an enemy far away. This is important because as soon as an enemy gets too close, the nearest soldiers will switch to their swords.
Tactics
The idea is to have the spear wall facing the enemy at all times.
Anyone approaching the phalanx from the front will take huge casualties, however if the enemy close enough the unit will switch to their hand weapons. It's also extremely deadly vs cavalry if you catch them on the front of the formation. Make sure you turn if off if you need your men to move quickly as they can't run while in phalanx formation.
A stationary phalanx is more effective, as the men brace themselves and are harder to push or move and resist charges better. The bracing is visually shown as an animation of the troops rasing pikes and shields and the units status will change to "Ready" instead of "idle" when still. Bracing happens automaticly when enemies get close and the unit is still.
The problems with phalanx is that its very slow and that if they are flanked its much harder for them to win. If the unit is flanked take them off phalanx, click to attack the flanking enemy then, when the troops turn around put them on phalanx again. This will make them lower the pikes, slaughtering the nearest troops and give them some breathing room to get back in formation.
When you order a phalanx to attack, they will usually raise their pikes - causing the formation to be useless, as enemies can walk right up to them while the pike wall is not up - while turning, so you want to make sure you are moving them straight at the enemy to ensure their pikes stay in postion It's usually a good idea to halt them right in front of the enemy, so they brace themselves before the melee and let the enemy charge you. If you have cavalry, once the melee starts send your cavalry around to the enemies rear and charge into the engaged units rear: this is almost always an insta-rout.
Phalanx units take skill and experience to use but once you master them there is nothing deadlier. Once you learn how to use the phalanx you can massacre armies with 2 or 3 or more times your numbers.
Quite a few phalanxes have low attack and defence and will suffer in melee. Often if the side of the phalanx is attacked and the soldiers have to use their swords other parts of the formation will continue to thrust their sears in phalanx formation. just because a phalanx is partly in melee doesn’t mean it can’t still be effective.’
Phalanxes should be deployed so they have no gaps between them if possible. They forms a solid wall of spear points and prevents the pikemen getting dragged into melee by enemies making it close enough or enemies managing to get behind or flank the phalanx. Faster troops or cavalry should be on the phalanx’s flank ready to intercept flankers. Normal non phalanx spearmen or other tough infantry are good for this as are cavalry if infantry are too slow to prevent flankers.
Use phalanx to block wall breaches and gates and watch the enemy die in droves against them. Any narrow area is a great place for a phalanx, as the enemy is focused onto their spearpoints. Just drag out the formation to fit the width of the gap you are blocking and if possible put missiles behind them to fire into the enemy.
Guard mode makes a large different to the phalanx. With guard mode on, the formation will stay more coherent, troops will take longer to resort to their sword if attacked close up, sometimes continuing to thrust forward while being attacked at point blank. With guard mode off the soldiers in the unit will move around slightly more and act somewhat more independently. They will also not hesitate as long to start fighting with their swords if enemies make it close.
Generally phalanx should be kept on guard mode. They are used to make a wall and kill off enemies with their pikes not fight with swords. Only take them off guard mode if they will be fighting in standard formation such as if their pike wall collapses or they need to be more mobile.
